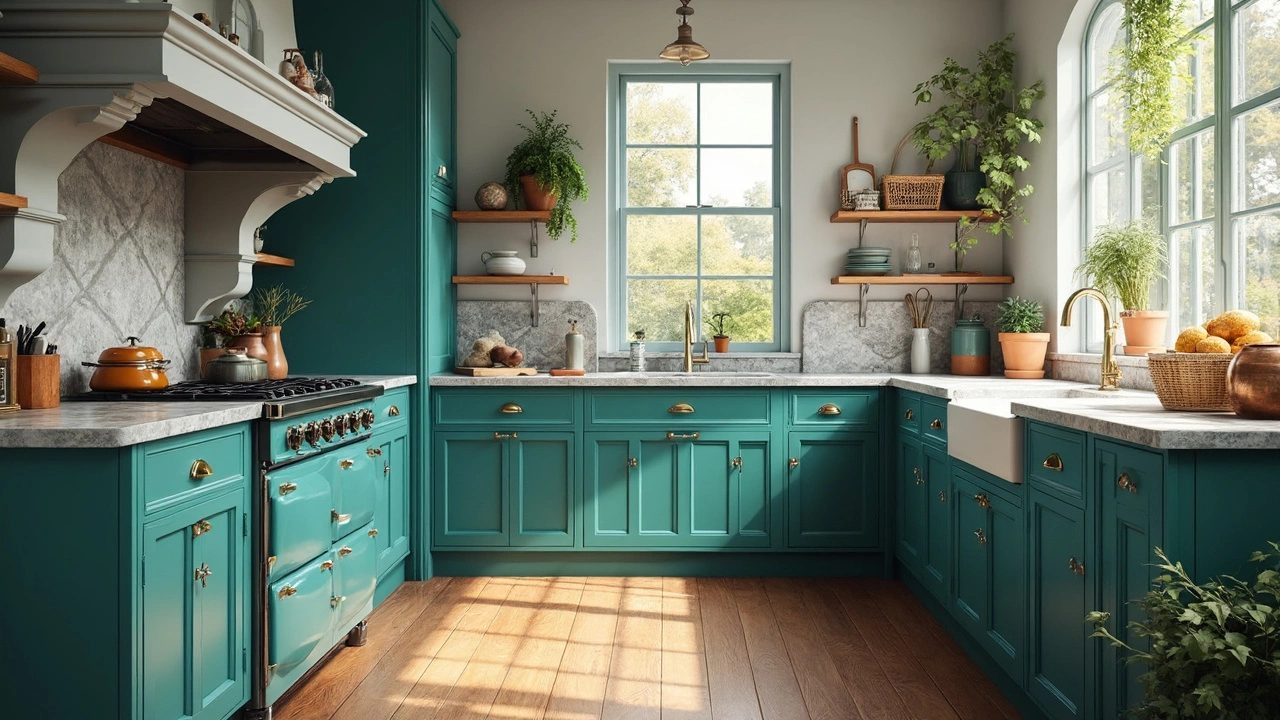
Kitchen Visualization: Turn Ideas into a Realistic 3D Plan
Planning a kitchen remodel can feel overwhelming. You pick cabinets, think about appliances, and wonder if everything will fit. That’s where kitchen visualization steps in. By creating a quick 3D mock‑up, you can spot problems before the first bolt is tightened and save both time and money.
Even if you’re not a design pro, today’s tools let you pull a realistic kitchen model together in an hour. All you need is a floor plan, a rough idea of your budget, and a willingness to experiment. Below you’ll find the most useful tricks for turning a sketch on napkin paper into a virtual space you can walk through.
Why Visualize Before You Build
First off, visualizing gives you a clear sense of scale. A 36‑inch island looks fine on a drawing, but in a real‑life walk‑through you’ll instantly notice if it blocks the cooking triangle or crowds the dining area. Seeing the space in 3D helps you decide whether a pendant light hangs too low or if a pantry door swings into the countertop.
Second, a visual model lets you play with colors and finishes without committing. Swap out a matte white cabinet for a soft gray, or test a bold backsplash pattern. When you can see the full effect, decision‑fatigue drops dramatically.
Finally, a realistic rendering becomes a powerful communication tool. Share the model with your partner, contractor, or supplier, and everyone will be on the same page. No more “I thought you meant glossy tiles.”
Simple Tools for Quick Kitchen Mock‑ups
Free online planners. Websites like Planner 5D, IKEA Home Planner, and SketchUp Free let you drag and drop cabinets, appliances, and lighting. They’re browser‑based, so no software install is needed. Start by entering the exact dimensions of your room, then place the main zones: cooking, cleaning, and storage.
Mobile apps. If you prefer working on a phone or tablet, try apps such as Houzz, Home Design 3D, or Magicplan. They use your device’s camera to capture room dimensions, then overlay a 3D model in real time. This is handy for checking sight lines while you’re actually standing in the space.
Spreadsheets with visual add‑ons. For budget‑focused remodels, a simple Excel sheet combined with the “SmartArt” feature can map out cabinet heights, countertop depths, and appliance footprints. Add a small image of each item and you get a clear, printable layout.
When you build your model, follow these quick steps: 1) Sketch the room’s perimeter and mark windows, doors, and utilities. 2) Add the work triangle – stove, sink, fridge – and make sure it’s not cramped. 3) Place cabinets and verify clearances (at least 42 inches between countertop and the back of a chair). 4) Insert appliances with their exact dimensions. 5) Finish with lighting, flooring, and color swatches.
After the first draft, walk through the 3D view. Does the traffic flow feel natural? Are you comfortable reaching the fridge from the sink? If something feels off, tweak it now – it’s much cheaper than re‑cutting cabinets later.
One last tip: save multiple versions. Keep a “budget‑friendly” layout and a “dream‑big” layout. When you compare them side by side, you’ll discover which high‑impact changes are worth the extra spend.
In short, kitchen visualization turns vague ideas into concrete plans. It saves money, cuts stress, and makes the whole remodel feel more like a fun project than a gamble. Grab a free tool today, map out your space, and watch your future kitchen come to life before you even order the first cabinet.