Budget Bathroom Makeover Calculator
Bathroom Upgrade Selection
Estimated Cost Breakdown
Budget Tip
Focus on 3 key impact zones: lighting, surface finishes, and accessories. These can transform your space without major expenses.
How This Works
This calculator estimates the cost of upgrading key bathroom features based on your selections. Each upgrade has a range of costs based on quality level (low-cost vs. premium). The total estimate helps you plan your budget effectively.
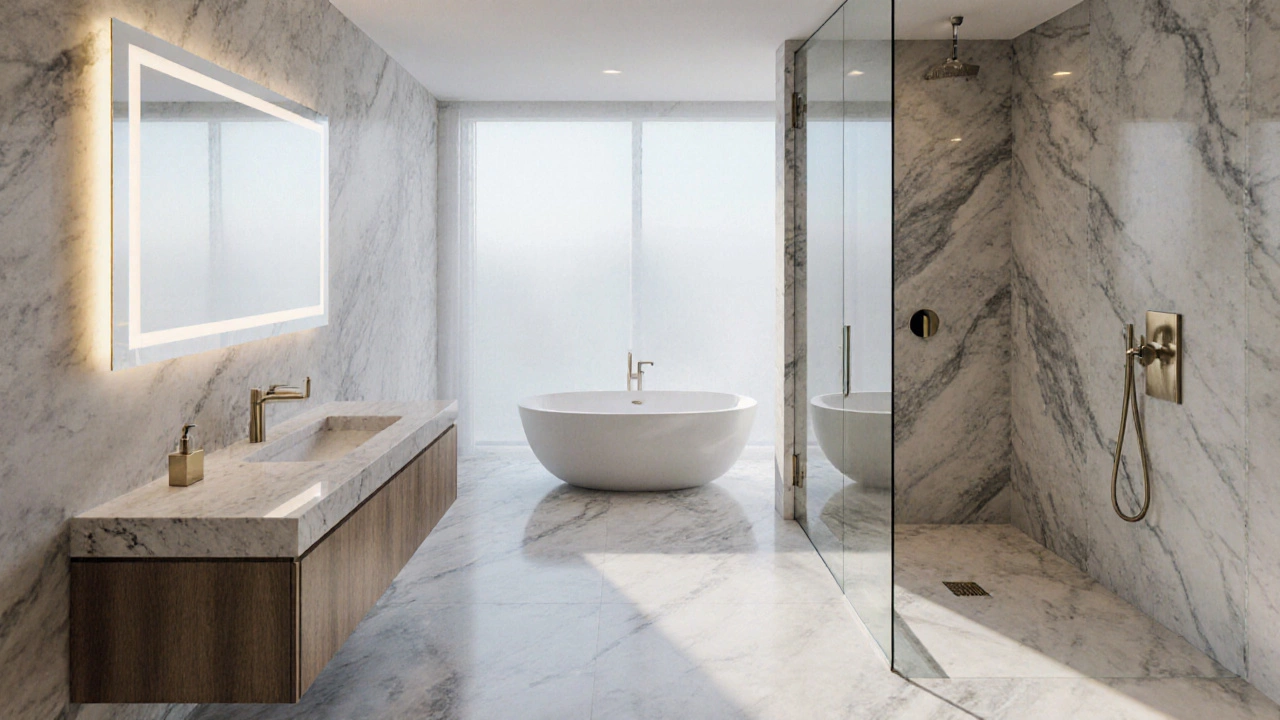
When you think of a luxurious bathroom is a high‑end, spa‑like space that feels spacious, stylish, and relaxing, you probably imagine a hefty price tag. The good news? A budget bathroom makeover can deliver that same vibe without draining your wallet.
Key Takeaways
- Focus on three impact zones: lighting, surface finishes, and accessories.
- DIY paint and hardware swaps can save 50‑70% of the cost.
- Smart storage tricks keep the space tidy and feel larger.
- Mix high‑impact, low‑budget items with a few splurges for a balanced look.
1. Set a Realistic Budget and Plan
Before you buy anything, decide how much you’re willing to spend. A practical rule is to allocate 40% to core fixtures (showerhead, vanity), 30% to finishes (tiles, paint), and 30% to accessories and lighting. Write down every line item - this forces you to compare prices and avoid impulse buys.
Use a simple spreadsheet or a free budgeting app. Mark each expense as essential (must‑have for function or durability) or impact (adds visual wow factor). Prioritize impact items that give the biggest visual change for the least cost.
2. Upgrade the Shower Experience
The shower is the bathroom’s focal point. Swapping an old showerhead (a rain‑type or handheld model that improves water coverage) for a sleek, water‑saving version can instantly feel upscale. Look for models with a chrome finish and a flow rate of 2.0gpm to balance luxury and efficiency. Expect to spend $30‑$80 at big‑box stores; many online retailers offer discount bundles that include a matching hose and mounting bracket.
If your budget allows a tiny splurge, consider a shower panel (a multi‑function unit with body jets and a digital thermostat). Even a basic panel can be found on sale for under $150 and adds a spa‑like feel.
3. Revamp the Vanity Without a Full Replacement
Instead of buying a brand‑new vanity, give your existing one a makeover. A fresh coat of paint or a veneer wrap transforms wood or laminate in an afternoon. Choose a matte finish in calming hues like dove gray or soft sage - these colors read as high‑end while staying neutral.
Upgrade hardware: replace dated knobs with brushed‑nickel or matte black handles. These tiny touches cost $5‑$15 each but make the vanity look custom‑crafted.
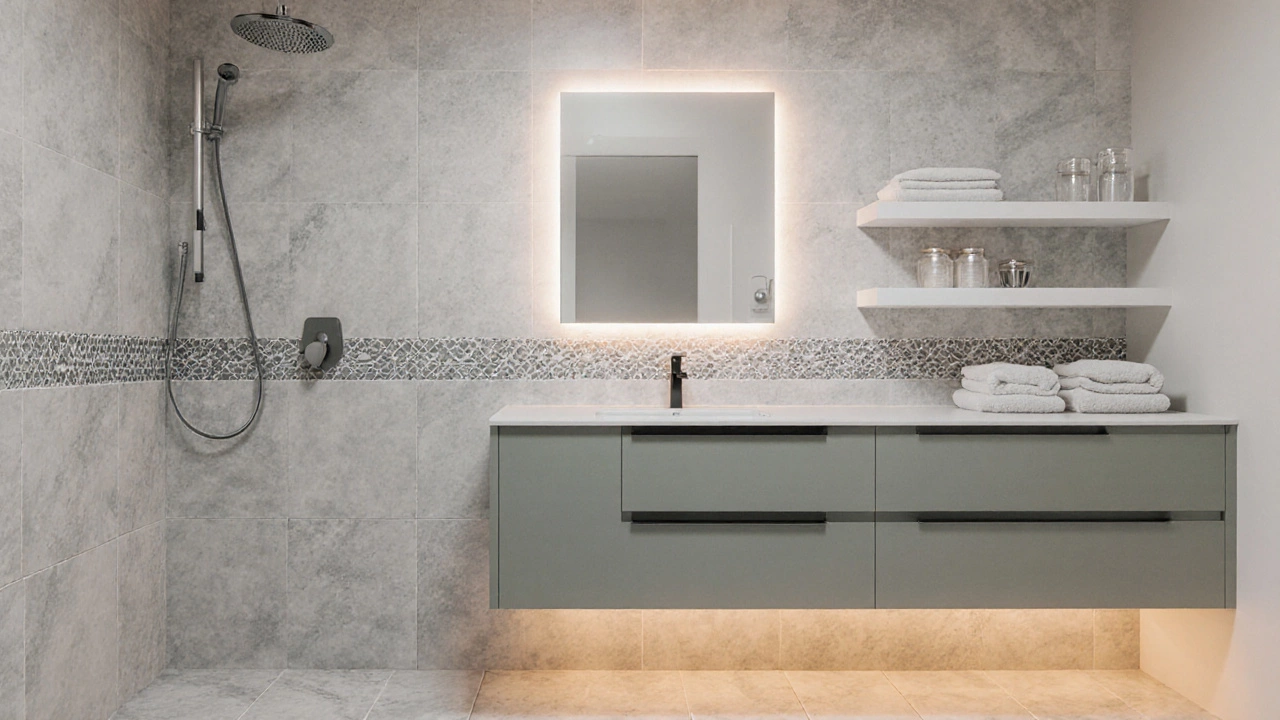
For an extra visual punch, add a vanity light (LED sconces or a backlit mirror that provides even illumination). A pair of 12‑inch LED sconces will run around $40 and instantly lift the overall ambience.

4. Choose Tiles That Wow but Won’t Break the Bank
Floor and wall tiles give texture and depth. Porcelain tiles are durable, water‑resistant, and often cheaper than natural stone. Look for large‑format tiles (12×12in or larger) - they reduce grout lines, making the room feel bigger.
Install a patterned runner or a decorative border only where it matters (e.g., a 3‑foot strip around the bathing area). This focused use of pattern creates visual interest without the cost of covering the entire floor.
If DIY isn’t your thing, hire a local tiler for a half‑day to lay the accent strip. Expect $200‑$350, a small price for a huge design impact.
5. Light Up the Space Strategically
Lighting is the secret weapon of any luxury bathroom. Aim for three layers: ambient, task, and accent.
Ambient: a recessed ceiling fixture or a slim LED strip behind a mirror provides even glow. Look for fixtures rated for damp locations - $20‑$50 each.
Task: vanity lighting should be positioned to eliminate shadows on the face. Adjustable arm sconces or a flush‑mount bar are budget‑friendly options.
Accent: add a subtle strip of LED tape under the vanity lip or behind a glass panel. This soft backlight looks expensive but costs under $15 per roll.
6. Finish with Affordable Accessories
Accessories are the finishing touches that tie everything together. Choose a cohesive palette - think brushed metal, matte black, or brushed nickel - and stick to it.
Replace plain towel bars with sculptural designs, swap old soap dispensers for sleek acrylic models, and add a plush, quick‑dry rug for under‑foot comfort. These items typically range $10‑$30 each, yet they elevate the overall feel.
Don’t forget the mirror (a large, frameless piece or one with integrated LED lighting). A frameless mirror over the vanity adds depth; a backlit LED mirror can be found for $80‑$120 and serves both style and function.
7. Smart Storage to Keep It Clutter‑Free
A tidy bathroom looks larger and more luxurious. Install floating shelves, a recessed niche inside the shower, or over‑door organizers. These solutions cost $25‑$70 each and can be installed with basic tools.
Use clear containers for toiletries and label them for quick access. This small habit reduces visual clutter and makes the space feel curated.
8. Cost‑Effective Design Tricks
Here’s a quick cheat sheet of high‑impact, low‑cost tricks:
- Paint the ceiling a crisp white - it reflects light and adds height.
- Swap out old faucet aerators with water‑saving models; they cost under $5 and improve flow.
- Apply a peel‑and‑stick backsplash behind the sink for a textured look - $15‑$25 per roll.
- Use a handheld shower curtain with a decorative fabric liner instead of a full glass enclosure.
Comparison: Low‑Cost vs. Premium Upgrades
| Upgrade Type | Low‑Cost Option | Premium Option | Typical Cost Range (AU$) |
|---|---|---|---|
| Showerhead | Standard rain‑type | Digital thermostatic panel | 30‑80 / 150‑300 |
| Vanity | Painted existing unit + new hardware | Solid‑wood custom vanity | 100‑200 / 800‑1500 |
| Tiles | Porcelain accent strip | Full‑size natural stone floor | 200‑350 (partial) / 1200‑2500 (full) |
| Lighting | LED sconces + tape accent | Designer fixtures with dimmer controls | 70‑150 / 400‑900 |
| Mirror | Frameless glass | Backlit LED mirror | 50‑80 / 120‑250 |
9. Maintenance Tips to Preserve Luxury
Keep the high‑end look longer by following simple maintenance habits. Wipe down surfaces after each use to prevent soap scum, use a non‑abrasive cleaner on tiles, and reseal grout annually. Swap out worn towels and shower curtains every six months to maintain the fresh aesthetic.
Next Steps for Your Budget Bathroom Transformation
- Set a clear budget and list priorities.
- Source one impact upgrade (e.g., showerhead) and install it first.
- Paint walls and the ceiling in a light, neutral hue.
- Upgrade hardware on the vanity and add new lighting.
- Finish with accessories, mirrors, and storage solutions.
- Take before‑and‑after photos to see your progress.
Frequently Asked Questions
How much does a typical budget bathroom makeover cost?
A modest makeover can be achieved for under AU$1,500 if you focus on paint, hardware swaps, and a few key fixtures. Adding premium touches pushes the budget toward AU$3,000‑$4,000.
Can I replace my bathtub without hiring a plumber?
If the new tub matches the existing plumbing layout, you can DIY it with basic tools. Make sure to shut off water, use proper caulking, and follow safety guidelines. For complex reroutes, hiring a plumber is safest.
What paint finish works best for bathrooms?
Choose a semi‑gloss or satin finish. These resist moisture, are easy to clean, and provide a subtle sheen that feels upscale.
Are LED lights safe for damp bathroom areas?
Yes, as long as the fixture is rated for damp or wet locations (IP44 or higher). LED fixtures also generate less heat, making them ideal for bathrooms.
How can I make a small bathroom feel larger?
Use light colors, minimize clutter, install a large mirror, and keep grout lines slim. Recessed lighting and a glass shower enclosure also create a sense of openness.